
Start With the Lifts You Want to Train Most
Before you compare frame sizes or price tags, write down the main movements you plan to do. A rack for squats and bench work may be enough for a beginner, while someone doing heavy barbell work most weeks may prefer the extra coverage of a full cage. Think about your training over the next 12 months, not only this month.
For many homes in Fourways, Sandton and Midrand, the right choice is the one that fits the room and the routine. If you only need a place to squat, press and do pull-ups, a lighter setup can work well. If you want more confidence for heavier sets or train alone, the added sides and safety bars of a cage can be worth the extra space.
- Squats with barbell
- Bench press inside or outside the frame
- Overhead press with enough headroom
- Pull-ups and hanging work
- Accessory work such as banded rows or supported split squats
Measure the Space Twice, Then Check the Ceiling Height
Many buyers measure the floor space but forget the ceiling. That is a problem when the bar reaches the top of the rack or when pull-up work needs extra clearance. Measure the full footprint, then add space for walking around, loading plates, and setting a bench. If your garage floor is uneven or your spare room has skirting and low bulkheads, allow for that too.
In Johannesburg homes, garages often share space with cars, tools and storage, so exact measurements matter. Leave enough room so the rack does not block doors, cupboards or the path to the gate. If you train in a flatlet or upstairs room, check floor loading and noise levels. Neighbours do not enjoy dropped plates at 5:30 in the morning.
- Floor space for the frame itself
- Clearance at the sides for loading plates
- Ceiling height for pull-ups and standing presses
- Room for a bench and plate storage
- Space to move safely behind the bar
Compare Safety Features, Not Just the Frame Shape
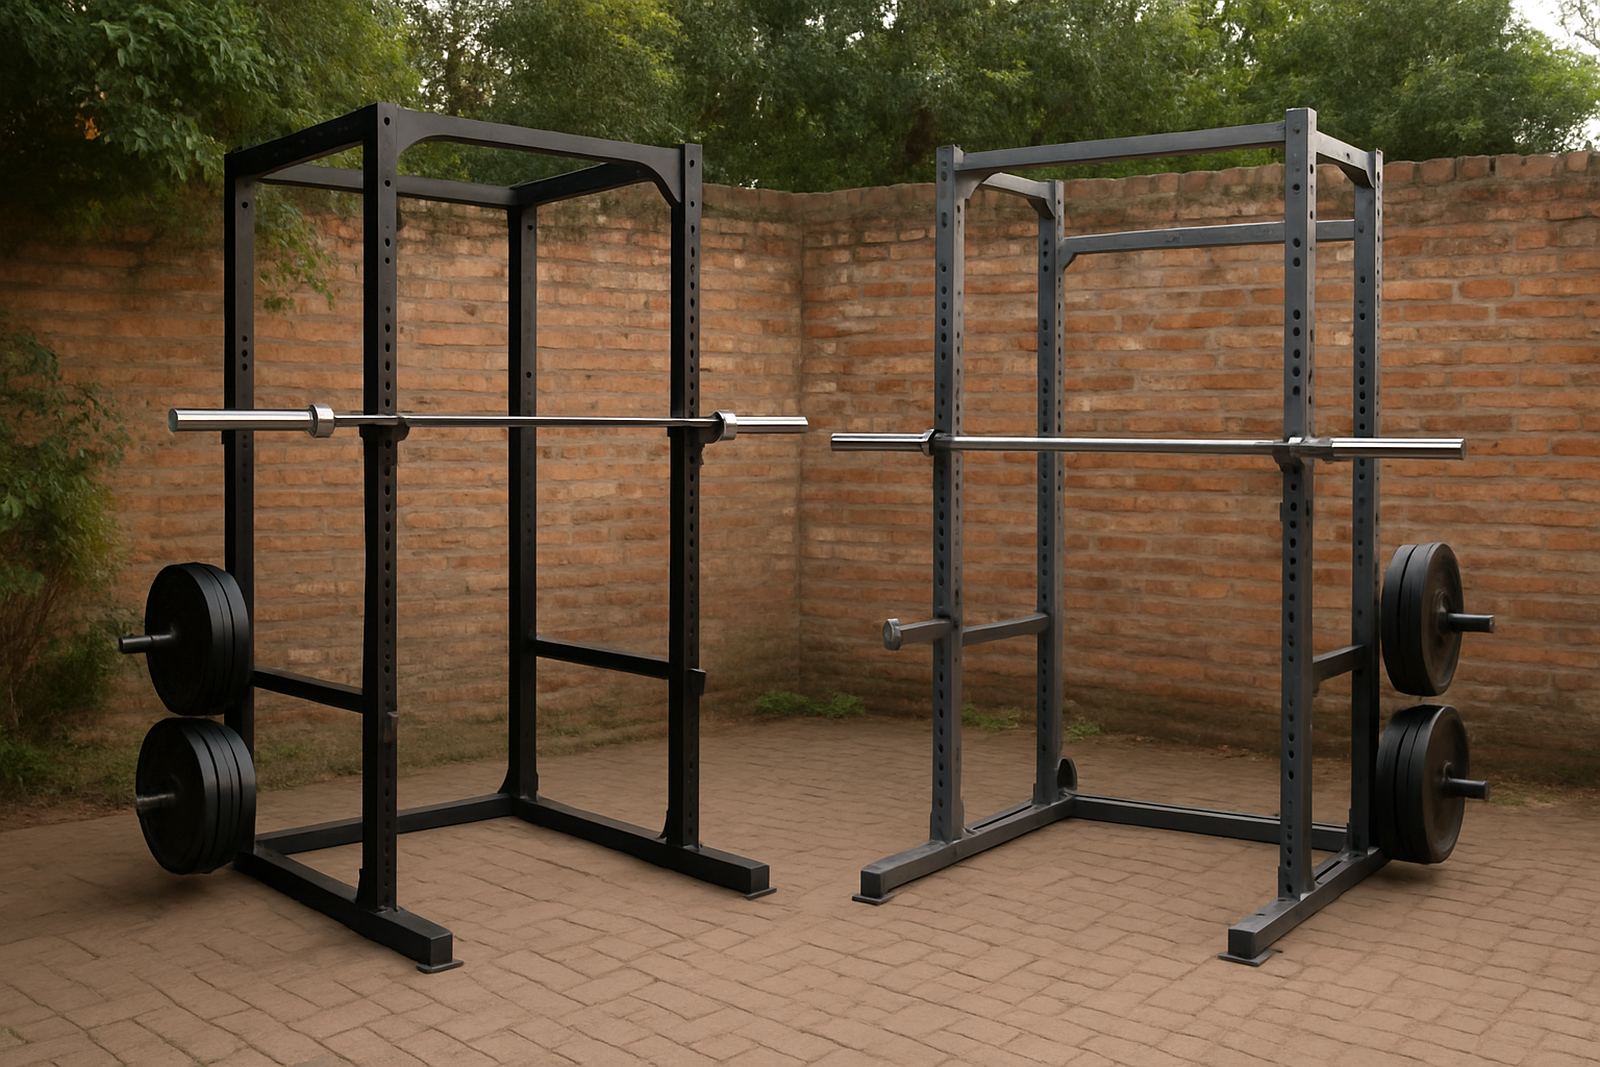
The main difference between a squat rack and a full cage is safety support. A cage usually gives more enclosed protection, while an open rack is quicker to use and takes less space. If you train without a spotter, adjustable safety arms or pins are important. They should sit level, lock properly and be easy to adjust between exercises.
Look closely at the steel thickness, base stability and how the uprights are braced. A rack that wobbles during re-racking is not ideal, even if it looks neat. For families using the same setup, safety matters even more because different users will have different heights and lifting styles. If children are around, store collars and smaller plates out of reach.
- Safety arms or pins with enough length
- Wide base with steady footing
- Solid locking points for J-hooks and safeties
- Hole spacing that allows small height changes
- Weight rating that suits your training now and later
Match the Rack to Your Bars, Benches and Plates
A strength rack should work with the rest of your home gym, not fight it. Check the internal width for your barbell, the height of the j-hooks, and whether your bench slides under the uprights without issue. Some compact racks look fine until you try to bench and find the bar path is too tight or the safeties sit in the wrong position.
Also think about plate storage and how often you will swap weights. If your setup is in a humid coastal home near Durban or in a dusty garage in Pretoria East, simpler moving parts and fewer unnecessary add-ons can mean less maintenance. Wipe down bare steel often, especially during winter or when load-shedding leaves the room cooler and damp.
- Barbell diameter and sleeve clearance
- Bench width and position under the rack
- Plate storage options, if needed
- Pull-up bar height and grip style
- Compatibility with attachments such as dip handles or landmine arms
Choose the Right Build Quality for Long-Term Use
Not all racks are built for the same workload. If you train three to five times a week, or you plan to share the rack with other adults in the house, choose stronger uprights and proper welds. A good finish helps too, because chipped paint and rust spots can spread faster in damp weather, especially in coastal areas and closed garages.
Ask about powder-coated finishes, bolt quality and whether the frame can be anchored if needed. In some homes, anchoring adds peace of mind. In others, a heavy enough base and level flooring may be enough. The key is to avoid buying too light for your actual use. Cheap can become expensive when the rack starts moving or needs replacing sooner than expected.
If power cuts affect your routine, remember that a strength rack gives you training options without needing electricity. That matters when you want to keep momentum during load-shedding or after a long day in traffic from Randburg or Roodepoort.
Use a Simple Buying Checklist Before Ordering a Strength Rack
Once you have compared space, safety and build quality, go through a final checklist. This keeps the decision practical and helps avoid returns or awkward surprises on delivery day. If you are setting up from scratch, ask for help with planning the full room, not only the rack. A proper setup should leave enough space for warm-ups, plate changes and mobility work.
For buyers in Fourways, Sandton, Midrand, Randburg, Roodepoort and Pretoria East, delivery timing and access also matter. Check whether the doorway, passage or garage entry can handle the packed item. If the rack needs assembly, confirm what tools are required and whether you will need a second person.
- Does the rack fit your room with at least 60 to 90 cm of movement space?
- Can you bench, squat and press without hitting the ceiling or walls?
- Are the safeties strong enough for solo training?
- Will the finish hold up in your garage or spare room?
- Does the rack suit your current plates, bar and bench?
When the answers are clear, the choice becomes much easier. You are not just buying steel, you are setting up a training space that should keep working through busy weeks, school runs and power cuts.